Processing a Sale
This guide walks you through the checkout flow: adding items to the cart, applying discounts and tips, and completing payment.
Stripe Setup
Before processing sales, you must connect a Stripe account:
- Go to Sales in the sidebar
- If you see "Connect Payment Account", click Create Stripe Account
- Complete Stripe's onboarding (business details, bank account, identity verification)
- If Stripe needs more information, you'll see "Continue Stripe Setup" – follow the prompts
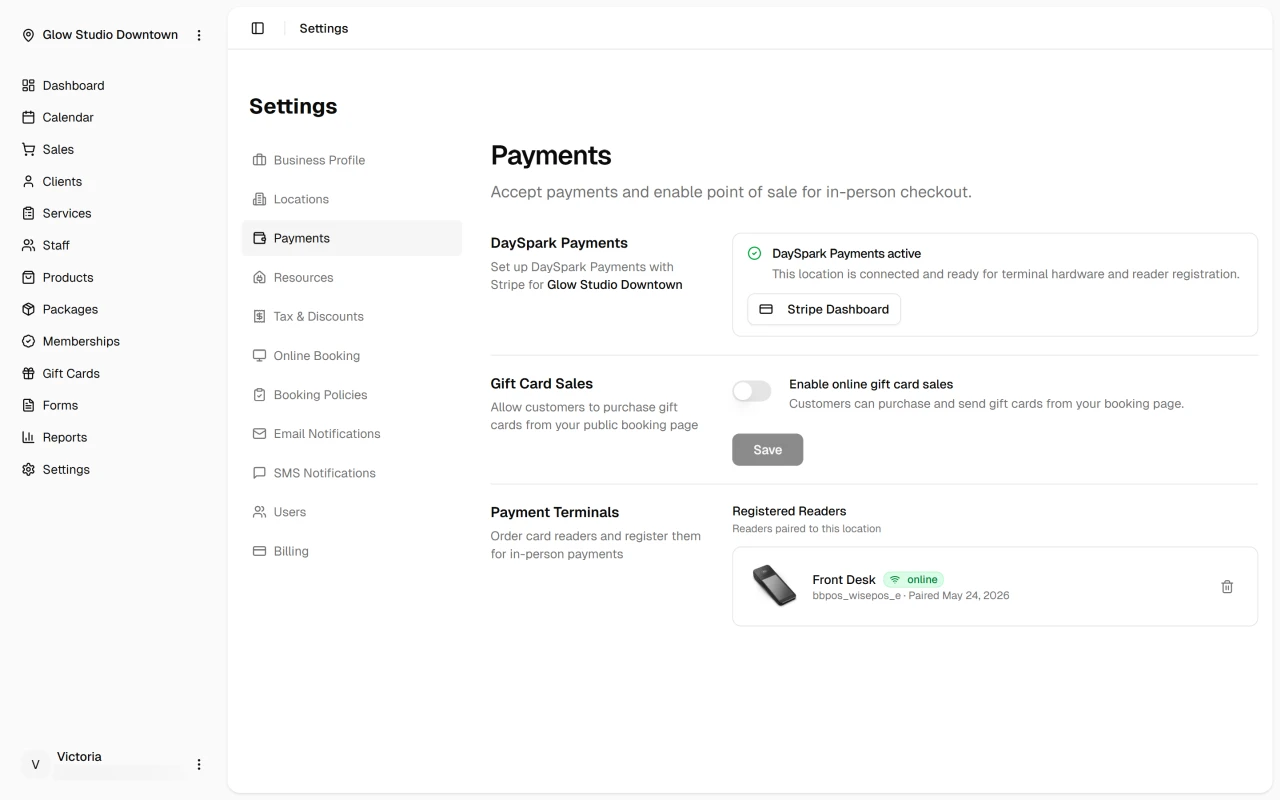
Once connected, the Sales page shows the sales table and New Sale button. Admin users can also open the Stripe Dashboard for payouts and reporting.
Opening Checkout
- Go to Sales in the sidebar
- Click New Sale
- A checkout drawer opens with two steps: Checkout (cart) and Complete Payment
You can also open checkout from the Calendar when viewing an appointment. The client and services from that appointment are pre-filled. See Checkout from Calendar for details.
Step 1: Checkout (Build Your Cart)
Select a Client
- Use the client search to find and select a client, or leave blank for a walk-in sale
- If you add a package to the cart, the client is required and cannot be changed until the package is removed
- When opened from an appointment, the client is locked to that appointment
Add Items
Use the dropdowns to add:
- Services – Grouped by category; shows duration and price
- Products – Grouped by category; shows stock when inventory is tracked
- Packages – Prepaid service bundles; requires a client to be selected
Items are filtered by the selected location. Products with inventory tracking show available quantity.
Cart Item Actions
For each item in the cart you can:
- Adjust quantity – Use + and − buttons (respects product stock limits)
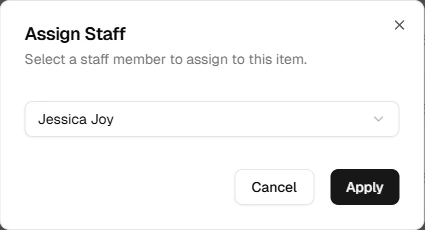
- Assign staff – For services, assign which staff member performed or will perform the service
- Adjust price – Click the pencil icon to apply a discount (fixed or percentage) or set a custom price
- Remove – Click the trash icon (items from appointments cannot be removed)
Discounts and Tips
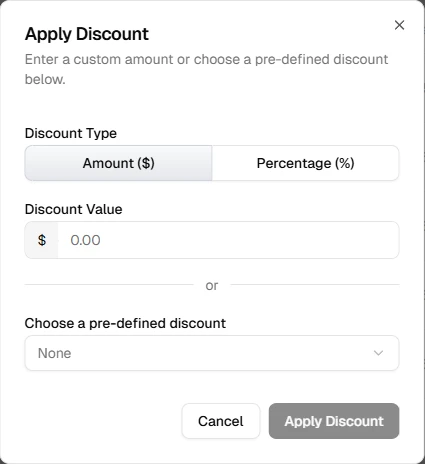
- Cart discount – Click Add discount to apply a fixed amount or percentage to the entire cart. You can also select a pre-defined discount preset if your account has any configured (see Tax and Discounts)
- Item discount – Use the pencil icon on a cart item to apply a per-item fixed or percentage discount, or set a fully custom price for that line
- Tip – Click Add tip to add a fixed amount or percentage tip. When using a card reader, you can also let the customer choose their tip directly on the reader's touchscreen instead
Totals
The cart shows a running total broken down as:
- Subtotal – Sum of all line items after any item-level discounts
- Discount – Cart-level discount, if applied
- Tax – Calculated from your location's tax settings. Service and product lines use their respective rates. Tax may be shown as "Included" if your location uses tax-inclusive pricing
- Tip – Added after tax (tips are not taxable)
- Total – The final amount due
Tax rates are configured in Settings → Tax & Discounts and assigned per location. For a full explanation of how tax and discounts work, see Tax and Discounts.
Continue to Payment
Click Continue to Payment when the cart is ready. You must have at least one item and a selected location.
Step 2: Complete Payment
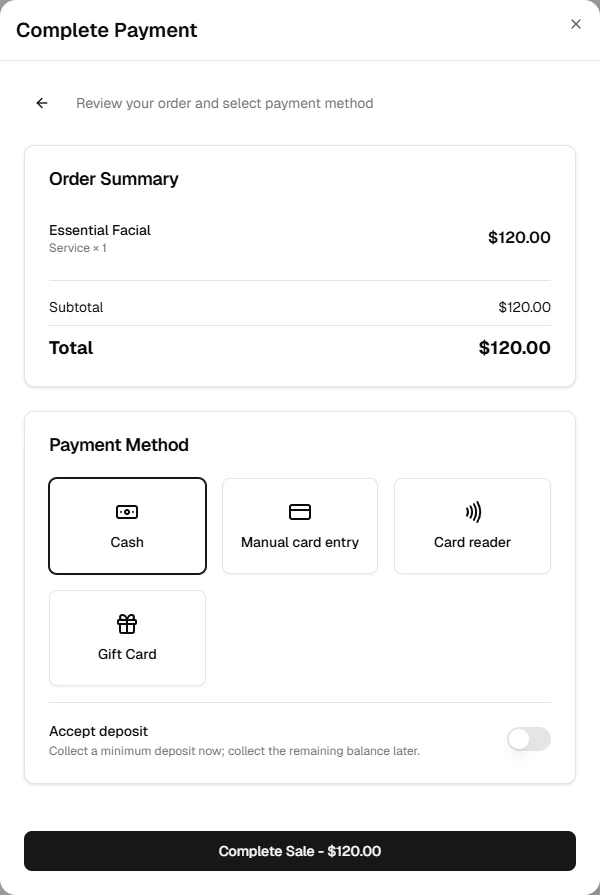
On the payment screen you choose how to pay:
- Cash – Record a cash payment
- Card on file – Charge a saved card (requires a client with saved payment methods)
- Manual card entry – Enter a new card via Stripe's secure form
- Card reader – Charge via the WisePOS E Smart Terminal; the customer taps, inserts, or swipes at the reader and can choose a tip on-screen (requires a registered reader — see Card Reader Setup)
- Split pay – Combine cash and card (requires a client with saved cards)
- Package – Redeem client packages for services in the cart (auto-selected when applicable)
- Membership – If a client's session credits fully cover the cart, payment is handled automatically with no tender required (see Redeeming Benefits at Checkout)
- Send payment link – Email the client a link to pay online (requires a client with an email)
For deposits, see Accept Deposit in Payment Methods.
Select your payment method, complete any required steps (e.g., choose a saved card or enter card details), then click Complete Sale.
After the Sale
- The sale is recorded and appears in Sales History
- You can print or email a receipt from the sale details
- If you accepted a deposit, you can collect the remaining balance later