Adding a New Staff Member
Add new team members to your DaySpark system so they can be assigned to services, locations, and schedules. This process creates their profile and sets up their availability for client bookings.
Creating a New Staff Member
Step 1: Access Staff Management
- Navigate to the Staff page in DaySpark.
- Click the "Add Staff" button to create a new staff member.
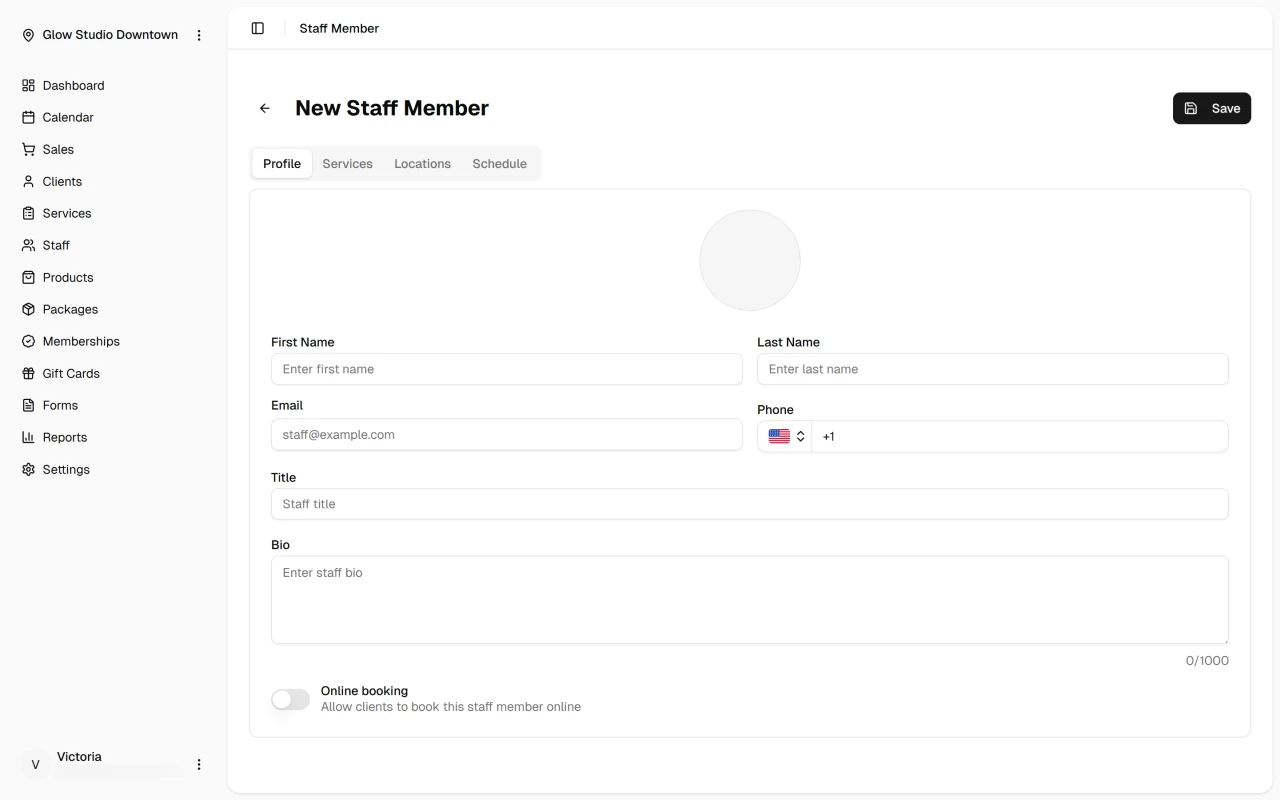
Step 2: Fill Out Basic Information
- First Name: Enter the staff member's first name (required).
- Last Name: Enter their last name (optional).
- Email: Enter their email address for system access (optional).
- Phone: Enter their phone number for team communication (must be a valid phone number format).
- Title: Enter their job title or role.
- Bio: Add a description of their experience and specialties (up to 1000 characters).
Step 3: Configure Online Booking
- Toggle the "Online Booking" switch to allow or prevent clients from booking this staff member online.
- When enabled, clients can book appointments with this staff member through your online booking system.
Step 4: Save the Profile
- Review all entered information to ensure accuracy.
- Click "Save" to create the staff member's profile.
- The new staff member will be added to your system and available for further configuration.
After Creating the Profile
Once the staff member is created, you'll need to complete their setup by assigning services, setting up their schedule, and configuring their locations. These steps ensure they can be booked for the right services at the right times and locations.
What's Next?
After creating your staff member:
Quick Tip
Start new staff members with a focused set of services and gradually expand their offerings as they settle in. This approach helps maintain service quality and builds client confidence.