Managing Staff Schedules
Set working hours for your staff members to control when they're available for bookings. You can set different schedules for each location where they work.
Setting Up Staff Schedules
Step 1: Access Staff Management
- Navigate to the Staff page in DaySpark.
- Click on any staff member's name to open their profile.
Step 2: Go to Schedule Tab
- In the staff member's profile, click on the "Schedule" tab.
- You'll see a "Working Hours" section with a location selector.
Step 3: Select a Location
- Use the dropdown to select which location's schedule you want to set.
- Each location can have different working hours for the same staff member.
Step 4: Set Working Hours
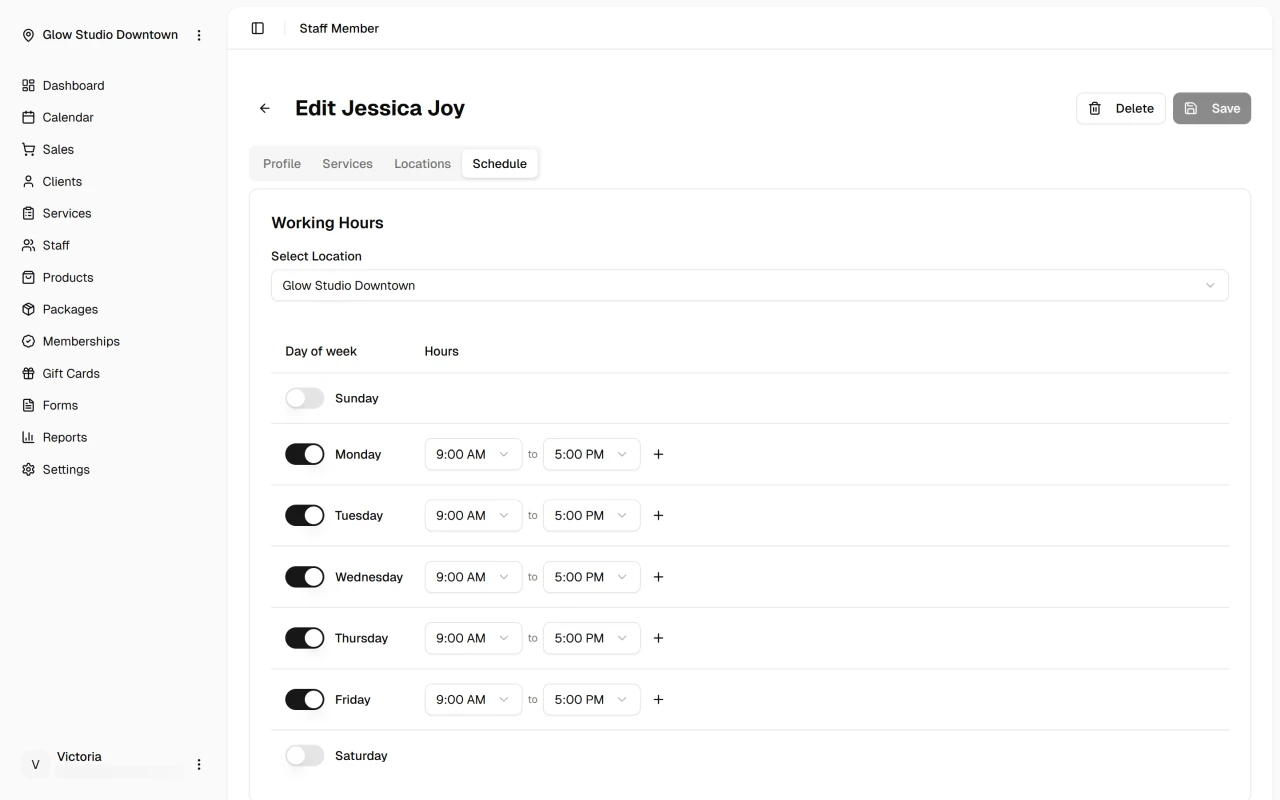
- Use the schedule interface to set the staff member's working hours for each day of the week.
- You can set different hours for different days.
- Include start and end times for each working day.
Step 5: Save Changes
- Click "Save" to apply the schedule.
- The staff member will now be available for booking during their set hours.
Managing Multiple Locations
If a staff member works at multiple locations, you'll need to set their schedule for each location separately. Use the location dropdown to switch between locations and set appropriate hours for each one.
What's Next?
After setting schedules:
Quick Tip
Set realistic working hours that account for preparation time and breaks. This helps prevent overbooking and ensures your staff can deliver quality service.